Testing your setup: a full order from start to finish
A step-by-step walkthrough to try controlled sales orders end to end before you rely on them, including confirming the instant checkout is properly locked.
Use this page to try the whole workflow once, start to finish, before your team relies on it — either right after switching your workspace on, or any time you want to confirm it still behaves the way it should. It's also a fair way to train someone new: have them work through it once with a spare product and a test customer.
You don't need a separate person for every role to try this — one person can play salesperson, stockkeeper, cashier, and manager in turn, as long as their own role is allowed to do each of those things. See Roles & what your team can see if a step below isn't available to you.
Before you start
Pick one real product you can afford to reserve a couple of units of, and either a saved test customer or a walk-in name. Note the product's Available figure before you begin — you'll check it again after each step.
Step 1 — Switch the workspace on
- Go to Settings → Sales Workflow.
- Under Controlled order & release, select Switch to... and confirm.
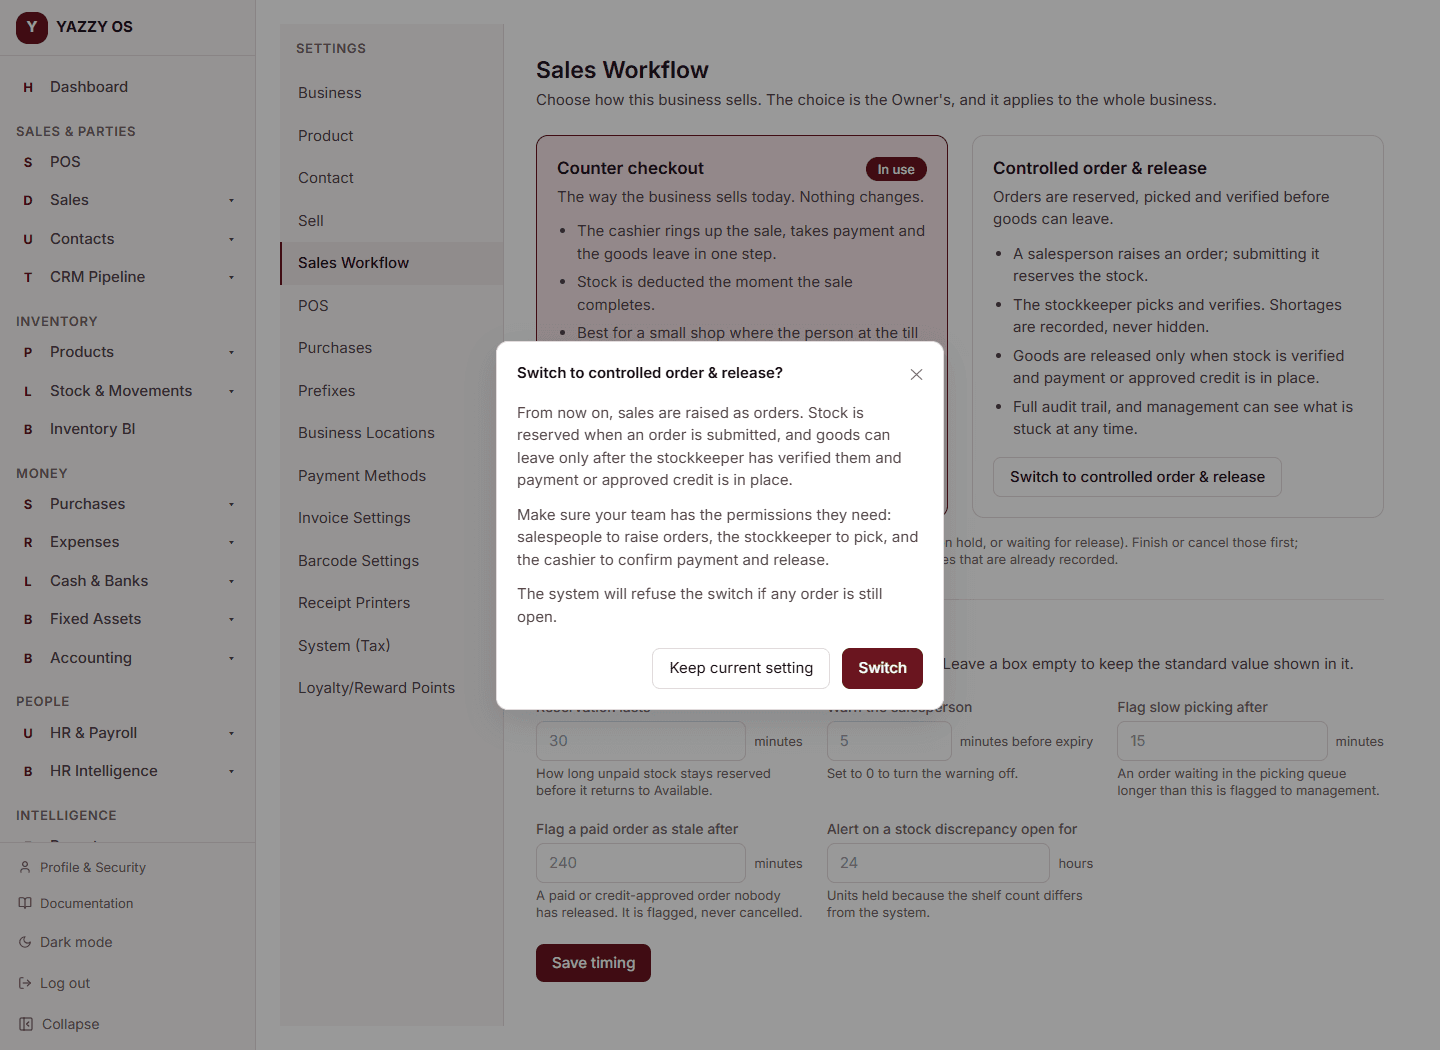
Full detail: Switching between the instant checkout and controlled sales orders.
Step 2 — Confirm the instant checkout is now locked
This is the check that matters most if you're testing after a recent change: the old instant checkout must refuse to start a new sale once controlled orders are on.
- Go to Sales POS (or select Add Sale, or open Quotations).
- You should see a message telling you this business uses controlled sales orders, with a link to New sales order — not the usual checkout screen.
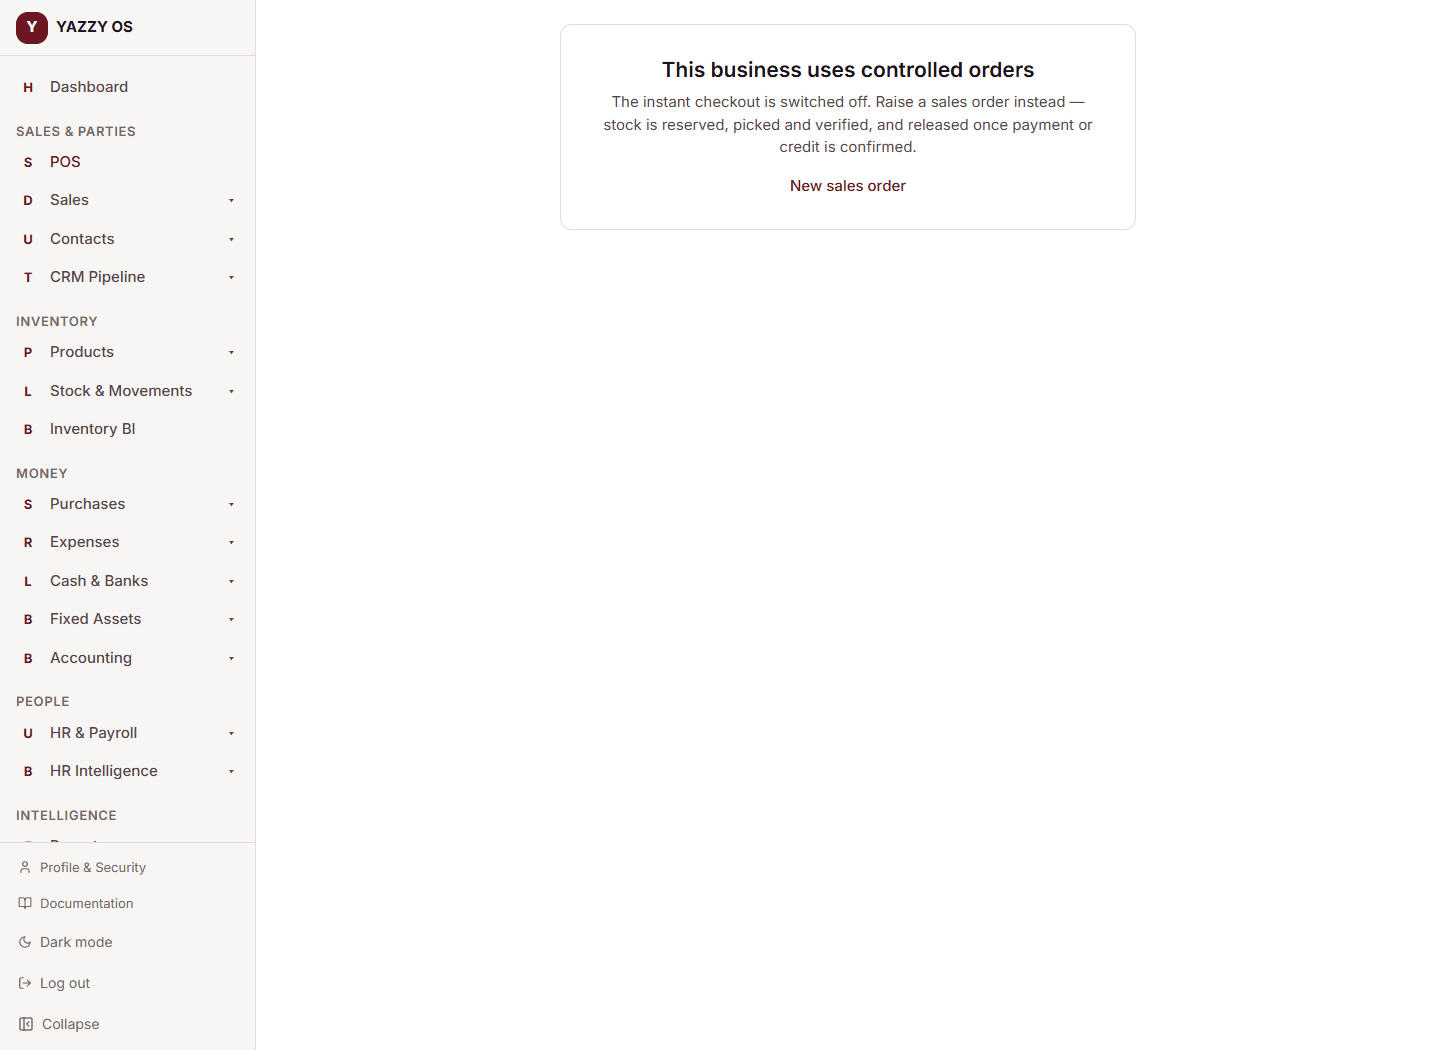
If any of POS, Add Sale, Drafts, or Quotations still let you complete a brand-new sale at this point, something is wrong — stop and raise it, since it means goods could leave without ever going through picking or a confirmed payment. (A sale you recorded before switching is unaffected either way — you should still be able to open, pay, and return it.)
Step 3 — Create and submit a sales order
- Go to Sales → Orders → New Order.
- Add your test product, note the Available figure it shows you, set a quantity, and select Submit Order.
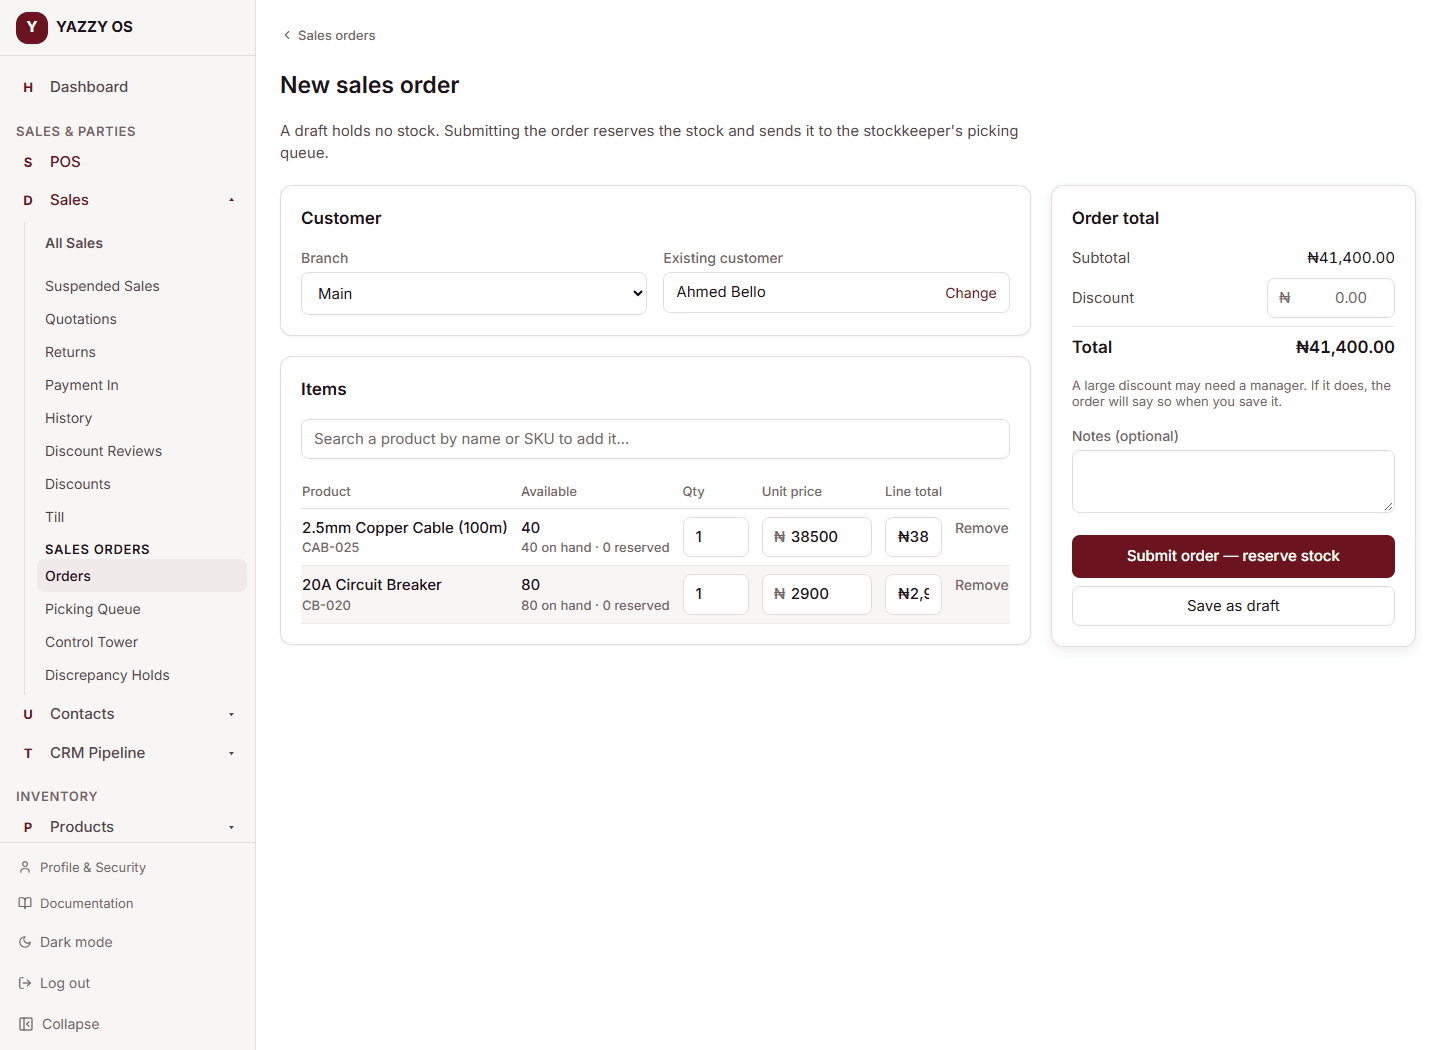
Now check the product's stock figures again (its own page, or the availability shown when starting a second order): Available should have dropped by exactly the quantity you submitted, while On-Hand hasn't moved yet — the reservation, not a sale, is what changed. If you like, open a second order for the same product and confirm it now shows less available than before.
Full detail: Creating and submitting a sales order.
Step 4 — Pick it (and try a shortage on purpose, once)
- Go to Sales → Picking Queue and open the order.
- Select Start Picking.
The first time you test this, deliberately try the shortage path so you know what your team will see: select Shortage on the line, enter one unit fewer than requested, give a reason, and submit. Confirm the order goes on hold and that the Discrepancy Holds screen now lists it. Resolve it with Ship what was found, then continue.
On a normal run-through, just mark every line picked and select Complete Picking — the order moves to Ready to release.
Full detail: Picking and stock shortages.
Step 5 — Settle payment or credit
Pick whichever matches how your business actually gets paid:
- Pay now: open the order, select Record Payment, enter the amount, then select Confirm once you'd treat the money as actually received.
- Credit instead: select Approve Credit under Credit, enter the amount and a reason (needs a saved customer, not a walk-in).
Confirm the order won't let you release yet if you skip this step — try Release Goods first with nothing paid, and you should be refused.
Full detail: Payments and credit on sales orders.
Step 6 — Release the goods
- Open the order — it should now show Ready to release.
- Select Release Goods and confirm.
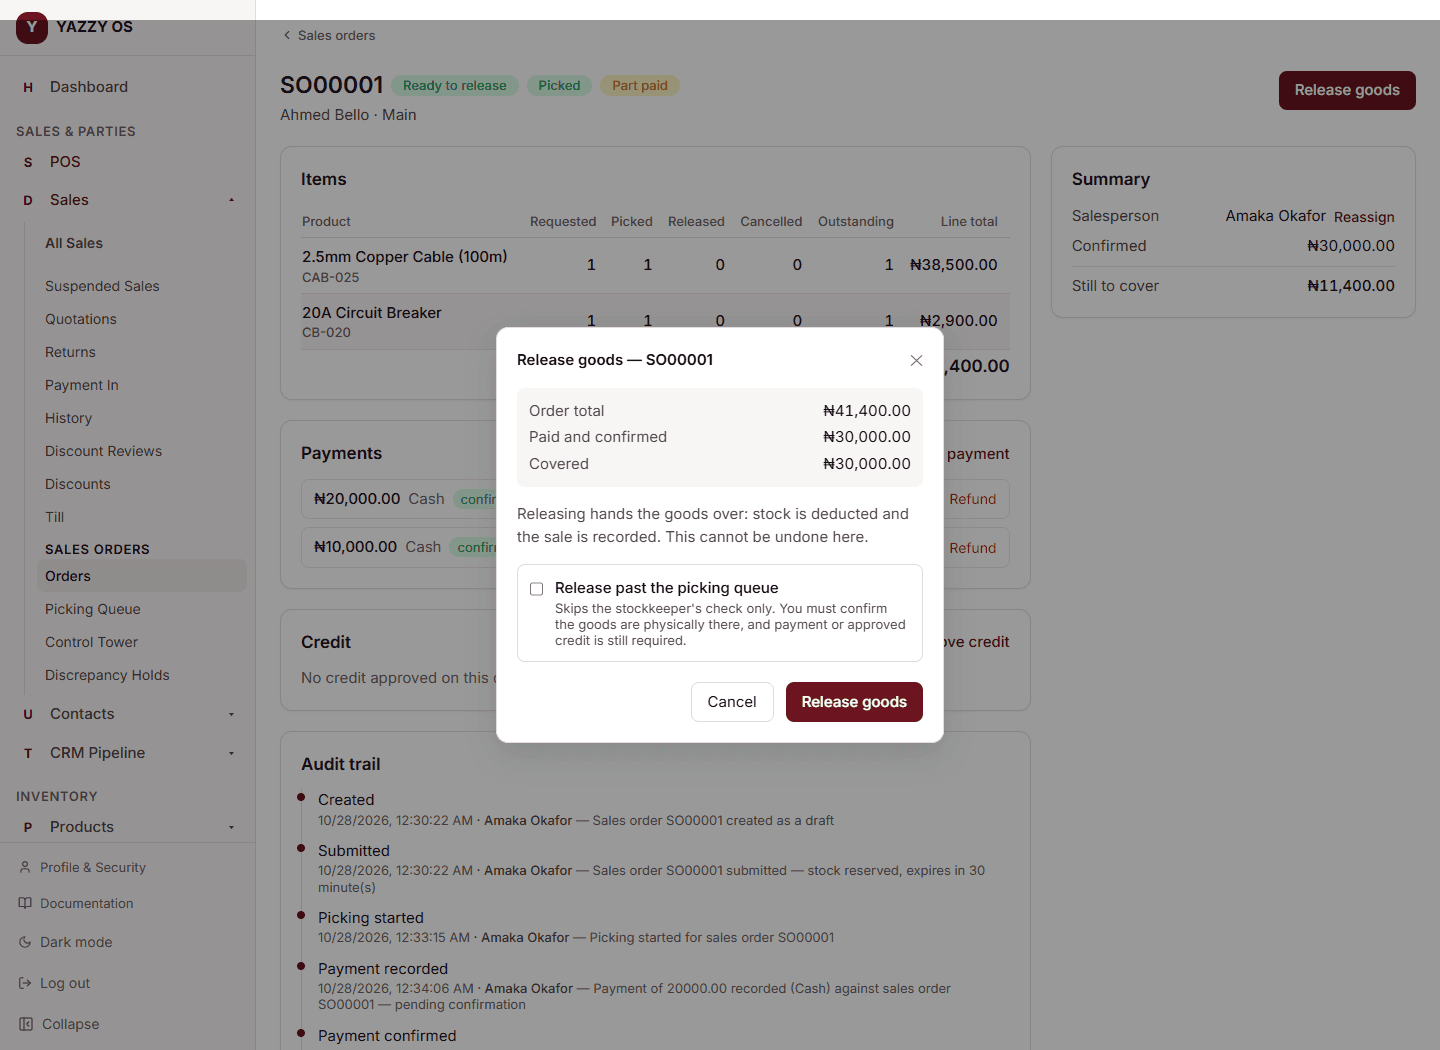
Check the product's On-Hand figure now — it should have dropped by the released quantity, and the order should show Completed. Try selecting Release Goods again (or refresh and retry) to confirm it doesn't create a second sale or deduct stock twice.
Full detail: Releasing goods on a sales order.
Step 7 — Read back the audit trail
Open the completed order and look at its history — you should see, in order, roughly: created, submitted, (a shortage and its resolution, if you tried Step 4's detour), picked, payment confirmed or credit approved, released. Each line names who did it and when. Nothing on this list can be edited or deleted after the fact — that's by design.
Optional — test the override path
If your business plans to use the release-past-picking override (Owner, or someone the Owner has named for it), try it once deliberately: create and submit a second order, then from the order select Release Goods with Release past the picking queue checked, before picking has been started. You'll be asked to type what you physically confirmed and give a reason. Confirm this still refuses if payment or credit isn't settled — the override only ever skips picking, never money.
Full detail: Releasing past the picking queue.
Step 8 — Confirm you can switch back
Try switching back to Counter checkout in Settings → Sales Workflow while any order is still open (draft, submitted, on hold, ready to release, or partly released) — it should refuse. Close out or cancel anything still open, then switch back and confirm Sales POS and Add Sale work normally again.