Roles & what your team can see
The eight roles YAZZY OS starts you with, and what each one can typically do.
How roles work
Every person you invite to your workspace gets a role, and their role decides what they can see and do — which modules they can open, whether they can just view something or also create/edit/delete it, and whether they're limited to one branch or can see your whole business.
YAZZY OS starts every workspace with eight ready-made roles. They're a sensible starting point, not a fixed limit — as the Owner, you can adjust exactly what any role can do, or create entirely new roles, from your workspace's role settings.
The eight starting roles
Owner — Full access to every feature, action, and setting in the workspace. This is the top-level administrator role.
Manager — Manages staff, inventory, and day-to-day operations across sales, purchases, expenses, HR, CRM, and reporting. Cannot delete the business or change workspace-level system settings.
Accountant — Full access to accounting, financial reports, tax, budgets, cash and banks, and expenses. View-only in the modules outside finance, such as sales and purchases.
Cashier — Point-of-sale and sales operations only: recording sales and viewing/creating customer records at the till.
Sales Rep — Sales, CRM, and customer/party management, including marketing campaigns.
HR Officer — Full access to the HR module: staff records, attendance, leave, payroll, recruitment, and performance.
Auditor — View-only access across every module, for oversight and audit purposes. Can't create, edit, or delete anything.
Store Clerk — Inventory management and stock operations, plus the ability to view and create purchases.
Every role (except Owner and Auditor's view-only design) can also always see and manage their own profile, attendance, and leave requests, regardless of what else they're permitted to do.
Your dashboard depends on your role
Everyone sees their own home page, built from what their role can view. There is no separate page to set up: give someone a permission and the matching tiles appear.
- Sales Rep and Cashier open on their sales: Sales today, this week, this month and this year, with two large buttons at the top, Add Sale and Sales Return (each shown only if the role may do it). Under it, View sales reports opens the sales reports.
- Store Clerk sees the stock tiles and alerts, such as low stock.
- Owner and Manager see the full business view.
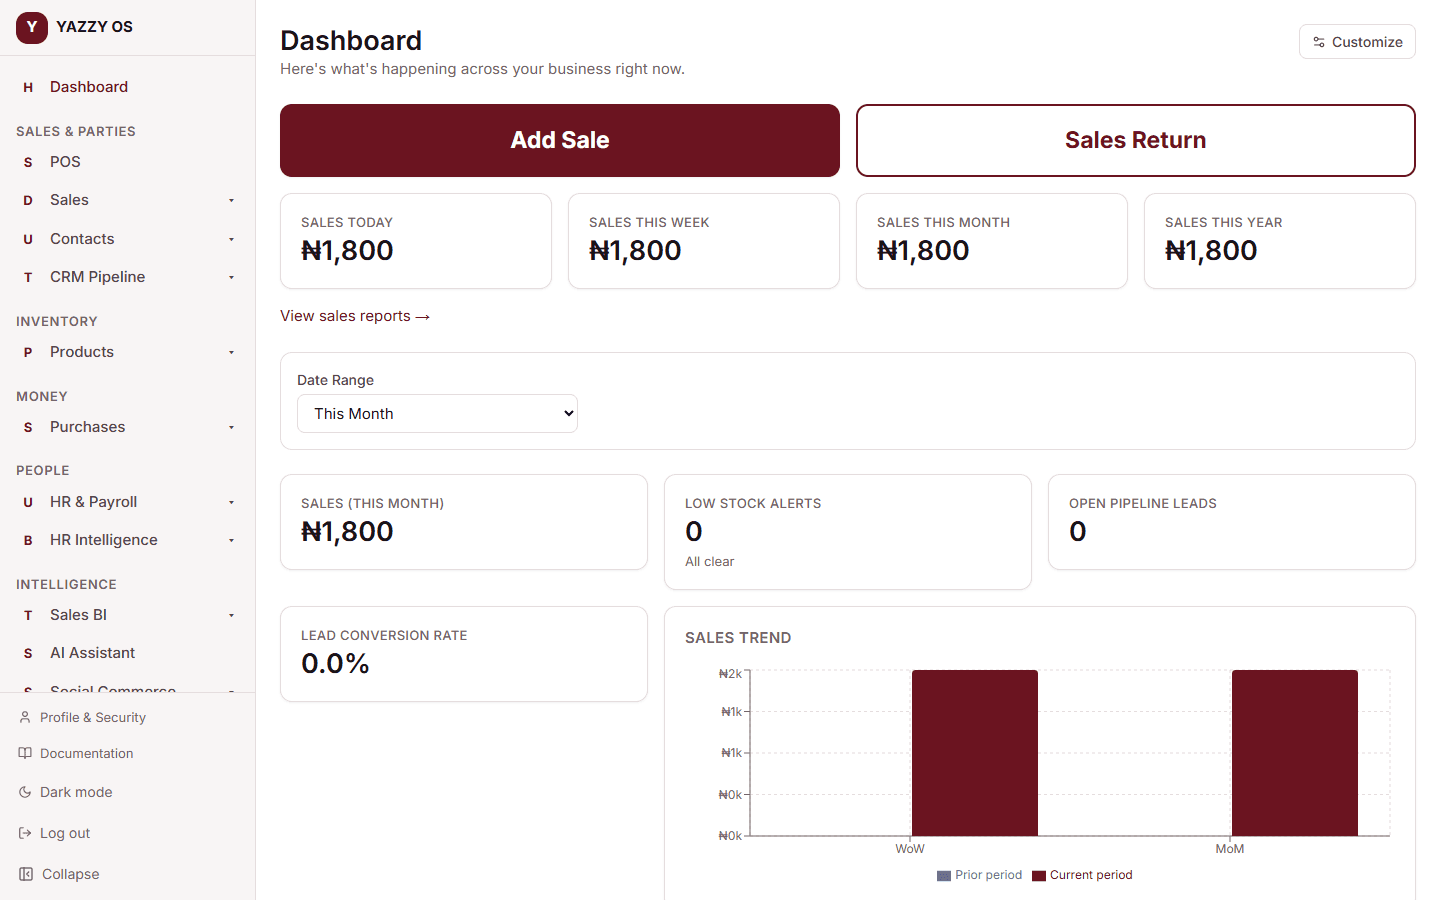
The tiles show the business's sales, not just the viewer's own, and the date picker works the same as everywhere else.
Sales reports, and what stays private
Anyone who can view Sales can open the sales reports: revenue, products, customers, salespeople, branches and payments.
Profit and margin are private. They appear only for people who can view Accounting, normally the Owner and the Accountant. For everyone else they are removed before the page is even sent, not just hidden on the screen, so the Gross Profit tile, the profit columns and the profit-only reports (margin protection, product profitability) are not there. Profit & Loss stays with the Owner.
Deleting records
Who can delete is decided by the delete permissions you give each role. Every delete, whoever does it, now asks "Why are you deleting this?" and needs a short reason. The reason is saved in the activity log with the person's name, what was deleted and when. The record then goes to the Recycle Bin, where the Owner can restore it.
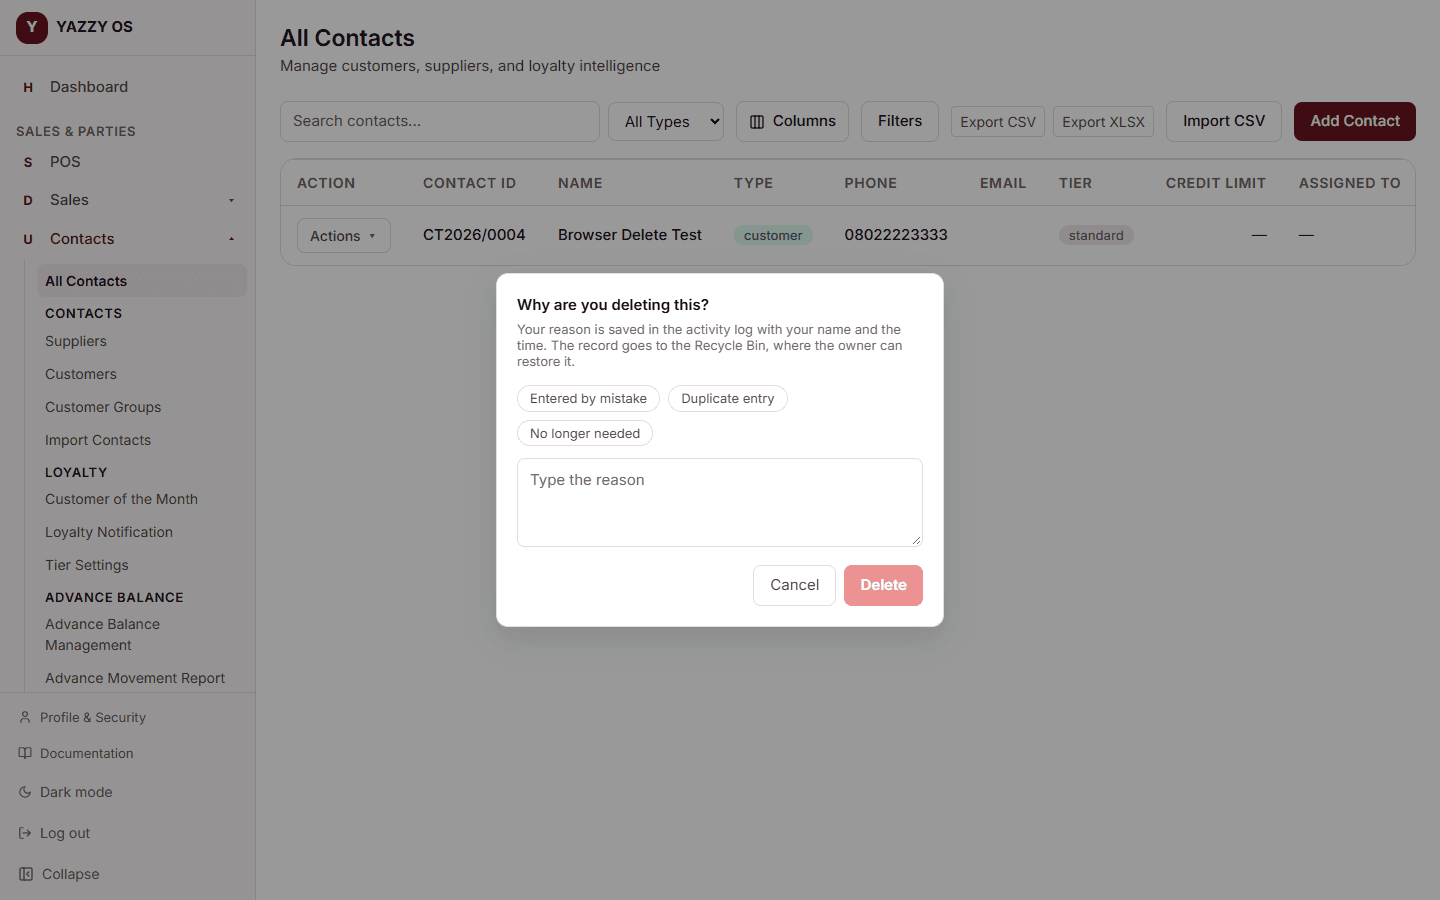
Signing out a session, revoking an invitation and similar housekeeping don't ask, because they don't remove a business record.
Restricting a role to one location
Independently of role, any team member can be restricted to a single branch when you invite them. See Branches / locations for what that changes.
Changing what a role can do
As the Owner, you can widen or narrow any of these roles, or build custom roles from scratch, from your workspace's role settings — for example, giving a specific Manager approval rights over discounts above a certain percentage, or letting an Accountant also view purchase orders.
Sell kits when a part is short
Selling a compound product (a kit) normally stops if one of its parts is short. The Sell kits when a part is short permission, under Sales / POS in the role settings, lets a role or person complete the sale anyway; the part's stock then goes negative so it can be reconciled later. It is off for everyone except the Owner until the Owner ticks it. It only covers kits — ordinary items follow the company-wide allow selling below stock setting.
Edit line subtotal / price
Changing what a line sells for — typing a new Subtotal in the cart, or a new Unit Price — is a permission of its own, found under Sales / POS in the role settings. It is off for Cashiers and Sales Reps, and on for the Owner and Managers.
Say you want your Sales Attendant to be able to agree prices with customers: open their role (or create a role for them) and tick Edit line subtotal / price. From then on, the Subtotal in the POS cart and on the Add Sale pages is a box they can click and type in. Everyone without it sees the amount but can't change it.
The permission is checked when the sale is saved, not just on the screen — a sale priced differently from the system price is refused with "You don't have permission to change prices" if the person saving it doesn't hold it. Selling at the normal price, including a customer's group price or a quantity price, never needs it.
Approval thresholds
For a few actions — purchase orders, expenses, fixed asset disposals, large deposit refunds, and settlement discounts — you can set a value threshold above which the action needs a second person's sign-off before it goes ahead, rather than relying only on who has permission to create it in the first place.
Go to Roles & Permissions → Approval Thresholds to see and add these.
To add one:
- Select Add Threshold.
- Choose what it applies to — a discount percentage, an expense amount, or a purchase order amount.
- Enter the value it triggers at — for example, an expense over ₦50,000.
- Enter the exact name of the role that should approve it, as it appears on your Roles tab (for example, "Manager"). The Owner can always approve, regardless of what you enter here.
- Optionally add a description, then select Create.
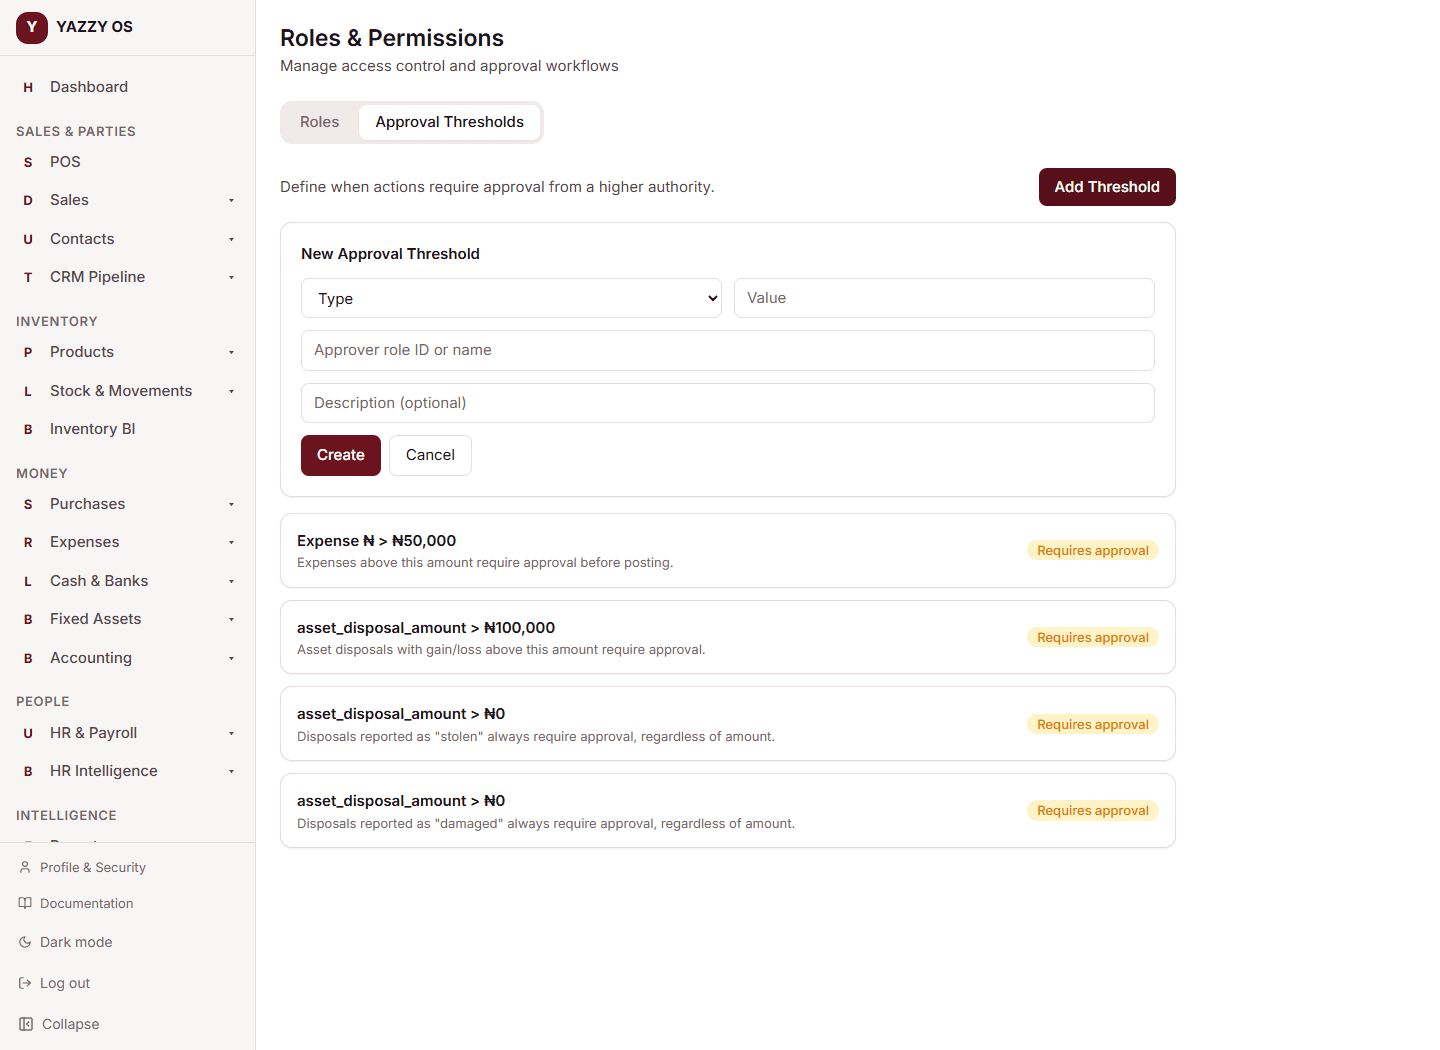
Once saved, anything that meets or exceeds that value is held as Pending Approval until someone holding the named role (or the Owner) approves or rejects it — it never goes ahead automatically.
If no threshold is set for something, it's approved automatically the moment it's submitted — there's no pending step, and nothing shows up waiting for anyone's sign-off. Add a threshold for anything you specifically want a second person to review first.
Related
- Your workspace, explained
- Branches / locations
- Recording a purchase from a supplier — purchase orders are one of the actions approval thresholds can apply to